Effective waterproofing before tiling is a critical step in any bathroom renovation or new build. It creates an impermeable barrier that protects the underlying structure from water damage, mold growth, and costly repairs. Simply put, waterproofing is the process of applying a material or system that prevents water from penetrating surfaces, ensuring that moisture from showers, splashes, and spills does not reach the subfloor, wall studs, or adjacent rooms. This proactive approach safeguards your investment and the structural integrity of your home.
Without proper waterproofing, even the best-laid tiles and grout lines—which are not inherently waterproof—will eventually allow moisture to seep through. This can lead to a host of problems, from cosmetic issues like efflorescence to serious structural damage, including rot, swollen drywall, and compromised floor joists. Understanding what needs to be sealed and how to do it correctly is fundamental to a long-lasting, problem-free bathroom.
Key Differences Between Bathroom Waterproofing Before Tiling and Waterproof Bathroom Walls
When discussing “bathroom waterproofing before tiling” and “waterproof bathroom walls,” it’s easy to assume they refer to the same thing. While related, they describe different aspects of moisture control within a bathroom environment.
“Bathroom waterproofing before tiling” describes the complete system applied to all surfaces susceptible to water exposure prior to tile installation. This usually covers the shower pan, shower walls, and frequently the entire bathroom floor, extending beyond only the immediate wet zones. The objective is to establish a continuous, sealed barrier that stops water from reaching the underlying structure. This process uses specialized products such as liquid membranes, sheet membranes, cementitious coatings, and suitable sealants for joints and openings. The emphasis here is on the application method and timing—it’s the foundational work that enables the tiling to function as an effective protective layer.
“Waterproof bathroom walls,” on the other hand, can refer to several things. It might describe walls that have undergone the “bathroom waterproofing before tiling” process, specifically within the shower enclosure. However, it can also refer to alternative wall finishes that are inherently water-resistant or waterproof without tiles. Examples include solid surface panels, PVC wall panels, or even specialized paints and plasters designed for high-moisture environments. In these cases, the “waterproof wall” itself acts as the primary barrier, sometimes negating the need for traditional tile and grout.
The key difference lies in scope and primary function. “Bathroom waterproofing before tiling” is a foundational step, a hidden layer of protection that enables tiles to perform their best in a wet environment. “Waterproof bathroom walls” can be the result of this foundational work or an alternative finishing material that provides its own waterproof capabilities.
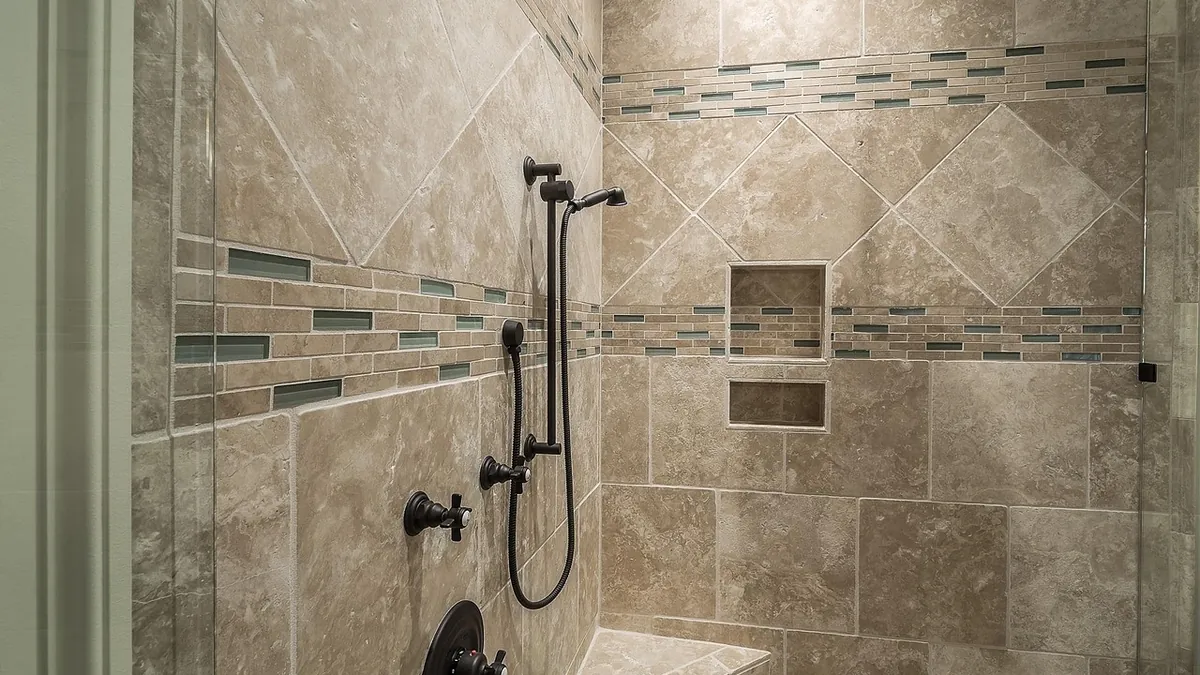
Consider a walk-in shower. “Bathroom waterproofing before tiling” would involve applying a liquid membrane to the cement board walls and shower pan, ensuring every seam, screw head, and corner is meticulously sealed. Then tiles are installed over this waterproofed substrate. If you opted for a solid surface shower panel instead of tile, those panels themselves would constitute “waterproof bathroom walls,” and the underlying substrate might only require basic moisture-resistant drywall, as the panels form the barrier.
Trade-offs exist. The “before tiling” approach offers maximum flexibility in tile choice and design but requires careful, multi-step application. Alternative waterproof wall finishes often offer faster installation and fewer grout lines but can limit aesthetic choices and sometimes cost more upfront for materials.
Shared Benefits and Overlaps
Despite their distinctions, both approaches share fundamental benefits and often overlap in their ultimate objective: protecting the building structure from water ingress.
The primary shared benefit is structural protection. Water is a potent destructive force in a building. Any method that prevents water from reaching wood studs, subflooring, or plaster protects these elements from rot, swelling, and degradation. This extends the lifespan of the bathroom and prevents costly, disruptive repairs down the line.
Both also contribute to mold and mildew prevention. Mold thrives in damp, dark environments. By preventing moisture penetration into wall cavities and under flooring, both strategies significantly reduce the conditions necessary for mold and mildew to take hold and spread. This is crucial for indoor air quality and occupant health.
Enhanced hygiene is another common advantage. Surfaces that are truly waterproof or highly water-resistant are easier to clean and less likely to harbor bacteria and grime that can accumulate in porous materials or damaged substrates. For instance, a properly waterproofed tiled shower, or a shower clad in solid waterproof panels, will resist staining and biological growth better than a compromised system.
There’s also an overlap in the zones of protection. While “waterproof bathroom walls” might suggest only the vertical surfaces, in practice, a truly effective bathroom design, whether tiled or not, extends waterproofing to the floor and potentially the ceiling in certain scenarios (e.g., steam showers). The underlying principle of creating a continuous barrier in high-splash areas remains consistent.
For example, whether you’re applying a liquid membrane to cement board before tiling or installing large format waterproof panels, both systems rely on meticulous attention to seams and penetrations. The critical junctions around shower valves, drain points, and corners are where most failures occur. Both methods demand the use of appropriate sealants, tapes, and flashing to ensure these vulnerable areas maintain their integrity. A failure in sealing a pipe penetration, regardless of the surface material, will undermine the entire effort.
Consider a bathroom where the shower walls are tiled over a waterproofing membrane, and the rest of the room has moisture-resistant drywall painted with a durable, washable paint. The “bathroom waterproofing before tiling” specifically protects the shower enclosure, while the general “waterproof bathroom walls” concept is addressed by the paint and drywall elsewhere. The goal across the entire room is to manage moisture effectively, even if the methods differ slightly based on direct exposure levels.
When Bathroom Waterproofing Before Tiling May Be a Better Fit
Bathroom waterproofing before tiling offers distinct advantages that make it the preferred choice in several common scenarios.
Firstly, for custom tile designs and aesthetic flexibility, this method is almost always superior. If your vision includes intricate tile patterns, specific tile sizes (e.g., mosaics, large format), or a particular grout color, waterproofing before tiling allows you to achieve that vision without compromise. The waterproofing layer is hidden beneath the tiles, providing a blank canvas for your design choices. For instance, creating a tiled shower niche or a decorative accent band requires a waterproof substrate underneath to ensure longevity, something alternative panel systems might struggle to integrate seamlessly.
Secondly, for long-term durability and repairability, traditional waterproofing combined with tiling often proves robust. A properly installed waterproofing system, such as a liquid or sheet membrane over cement board, is designed to last for decades. Should a tile crack or become damaged, it can often be replaced without compromising the underlying waterproofing, provided the damage hasn’t extended through the membrane. This is a significant advantage over integrated panel systems where damage to a single panel might necessitate replacing a larger section.
Thirdly, in high-moisture environments like steam showers or frequently used family bathrooms, the redundancy offered by a dedicated waterproofing layer beneath tiles provides an extra margin of safety. Steam showers, in particular, demand a continuous vapor barrier in addition to waterproofing, and these systems are typically designed to integrate seamlessly with tile installations. The layered approach—substrate, waterproofing, thin-set, tile, grout—offers multiple lines of defense against water intrusion.
Consider a scenario where a homeowner wants a curbless shower entry. This design requires meticulous attention to floor slope and waterproofing to ensure water drains effectively and doesn’t escape the shower area. A liquid or sheet membrane applied continuously from the shower floor up the walls and seamlessly integrated with the drain flange is the most reliable way to achieve this. Trying to achieve a curbless design with pre-fabricated waterproof panels can be significantly more challenging and may not offer the same level of customization for slope and drain integration.
Finally, for adherence to building codes and industry standards, waterproofing before tiling is a well-established and widely accepted practice. Many building codes specify requirements for moisture barriers in wet areas, and proprietary waterproofing systems often come with certifications and warranties that meet or exceed these standards. Professional tile installers are typically highly skilled in these traditional waterproofing methods, ensuring a quality installation.
When Waterproof Bathroom Walls May Be a Better Fit
While tiling over a waterproof membrane is a robust solution, there are specific situations where opting for inherently waterproof wall finishes or panel systems might be a more suitable choice.
Firstly, for speed of installation and reduced labor costs, waterproof panels or solid surface materials often excel. Unlike tiling, which involves multiple steps (substrate prep, waterproofing application, thin-set, tile setting, grouting, sealing), panel systems can often be installed in a fraction of the time. This can be particularly appealing for quick renovations, rental properties, or situations where minimizing downtime is critical. Imagine a small bathroom remodel where the goal is to get it functional again as quickly as possible; large waterproof panels can be installed in a day or two, compared to several days for a tiled shower.
Secondly, for minimal maintenance and ease of cleaning, integrated waterproof wall systems often have an edge. The absence of grout lines significantly reduces areas where mold, mildew, and soap scum can accumulate. Surfaces like acrylic, solid surface, or PVC panels are typically non-porous and wipe clean easily, requiring less effort to maintain a pristine appearance. This is a strong consideration for busy households or individuals seeking a low-maintenance bathroom.
Thirdly, for budget-conscious projects where material costs are prioritized over extensive customization, certain waterproof wall options can be more economical. While high-end solid surface panels can be expensive, more basic acrylic or PVC shower surrounds can offer a cost-effective solution compared to the combined cost of tiles, waterproofing membranes, thin-set, grout, and professional tile installation. It’s important to compare the total installed cost, not just material prices.
Consider a scenario where a homeowner is upgrading a guest bathroom or a basement bathroom on a tighter budget. Instead of investing in intricate tile work and the associated labor, they might opt for a pre-fabricated fiberglass or acrylic shower unit that includes the pan and wall surrounds. This provides a completely waterproof enclosure with minimal seams and a relatively quick installation, meeting the functional need without the higher cost and time commitment of a custom tile job.
Finally, for specific aesthetic preferences that lean towards a seamless, monolithic look, waterproof panels are often the natural choice. If the desired aesthetic is clean, modern, and free of grout lines, large format solid surface panels or even glass panels can create a sleek, uninterrupted surface that tile cannot replicate.
How to Choose Based on Goals and Context
Selecting the right waterproofing approach for your bathroom depends heavily on your specific goals, budget, desired aesthetic, and the context of the project. There’s no one-size-fits-all answer, but by considering key factors, you can make an informed decision.
Here’s a comparison table to help weigh the options:
| Feature/Consideration | Bathroom Waterproofing Before Tiling (Traditional Tiled Shower) | Waterproof Bathroom Walls (e.g., Panels, Solid Surface) |
|---|---|---|
| Aesthetic Flexibility | High: Unlimited tile choices, patterns, sizes, and grout colors. Custom niches, benches. | Moderate to Low: Limited patterns, colors; seamless look. Fewer custom elements. |
| Installation Time | Longer: Multiple steps (substrate, waterproofing, tiling, grouting). | Shorter: Fewer steps, often installed in large sections. |
| Labor Cost | Higher: Requires skilled tile setter and waterproofing application. | Lower to Moderate: Simpler installation, can sometimes be DIY-friendly for basic units. |
| Material Cost Range | Wide: From budget-friendly ceramic to high-end natural stone. Waterproofing adds cost. | Wide: From inexpensive acrylic to high-end solid surface. Often includes wall finish. |
| Maintenance | Moderate: Grout lines require cleaning, occasional sealing. | Low: Seamless, non-porous surfaces are easy to wipe clean, no grout. |
| Durability/Longevity | High: Properly installed system can last decades. Good repairability of individual tiles. | High: Dependent on material quality. Damage to one panel might mean replacing a larger section. |
| Moisture Protection | Excellent: Layered system provides robust, redundant barrier when installed correctly. | Excellent: Seamless surfaces are inherently waterproof. Seams must be well-sealed. |
| Ideal For | Custom designs, luxury bathrooms, high-traffic showers, steam showers, long-term investments. | Quick renovations, budget-conscious projects, low-maintenance needs, modern seamless aesthetics. |
Consider your budget: If cost is the primary driver, evaluate both material and labor expenses. Sometimes, the initial material cost of a panel system might seem higher, but the reduced labor for installation could make the overall project less expensive than a fully tiled and waterproofed shower. Conversely, choosing basic ceramic tiles with a standard waterproofing membrane might be more affordable than high-end solid surface panels.
Assess your aesthetic preferences: Do you dream of a specific tile pattern, a natural stone look, or a vibrant mosaic? Then traditional waterproofing before tiling is likely your path. If you prefer a minimalist, grout-free, uniform appearance, then waterproof panels or solid surface options will better achieve that.
Evaluate the level of use: For a main family bathroom or a steam shower that sees daily heavy use, investing in the most robust waterproofing system underneath tiles provides the best long-term protection. For a rarely used guest bathroom, a simpler, quicker panel system might be perfectly adequate.
Consider your DIY capabilities (if applicable): While professional installation is always recommended for waterproofing, some panel systems are more amenable to a competent DIYer than the intricate process of tiling and waterproofing. However, even with panels, proper sealing of joints and penetrations is crucial.
Ultimately, the choice hinges on balancing these factors. A high-end custom master bathroom will almost certainly benefit from a comprehensive “waterproofing before tiling” approach, while a quick refresh of a small powder room might lean towards a simpler, waterproof wall panel system.
Frequently Asked Questions
What is bathroom waterproofing before tiling?
Bathroom waterproofing before tiling is the process of applying a continuous, impermeable barrier to all water-prone surfaces in a bathroom before any tiles are installed. This barrier, typically a liquid membrane, sheet membrane (tile membrane), or cementitious coating, prevents water from penetrating the underlying structure (e.g., wood studs, drywall, subfloor). Its purpose is to protect against water damage, mold growth, and structural degradation, as tiles and grout themselves are not fully waterproof. It’s a critical preparatory step to ensure the long-term integrity of a tiled bathroom.
How does bathroom waterproofing before tiling compare with alternatives?
Bathroom waterproofing before tiling provides the foundational protection for a tiled finish, offering maximum design flexibility and proven long-term durability when installed correctly. Alternatives often involve using inherently waterproof or highly water-resistant finished materials directly, such as solid surface panels, acrylic/fiberglass shower surrounds, or PVC wall panels.
The key comparison points are:
- Design Flexibility: Tiling offers unlimited aesthetic choices; alternatives are more limited.
- Installation Time: Alternatives are generally faster to install due to fewer steps and larger pieces.
- Maintenance: Alternatives typically have fewer grout lines, making them easier to clean.
- Cost: The total installed cost can vary, but alternatives might be cheaper for basic setups due to reduced labor.
- Repairability: Individual tiles can often be replaced; damage to a panel might require replacing a larger section.
While both aim to protect against water, waterproofing before tiling is a hidden barrier for a tiled surface, whereas alternatives are often the visible, finished waterproof surface itself.
What are the most common mistakes people make with bathroom waterproofing before tiling?
Several common mistakes can compromise the effectiveness of bathroom waterproofing:
- Inadequate Surface Preparation: Applying waterproofing over dusty, greasy, or uneven surfaces prevents proper adhesion, leading to failure. Surfaces must be clean, dry, and structurally sound.
- Skipping Priming: Many waterproofing membranes require a specific primer to ensure optimal bond to the substrate. Skipping this step can lead to delamination.
- Insufficient Coverage/Thickness: Not applying enough coats or not achieving the manufacturer’s recommended thickness for liquid membranes can result in a permeable barrier.
- Improper Sealing of Penetrations and Corners: These are the most vulnerable points. Failure to use appropriate waterproofing tapes, sealants, or pre-formed corners around drains, shower valves, niches, and wall-to-floor junctions is a primary cause of leaks.
- Using the Wrong Materials: Not all “water-resistant” materials are “waterproof.” Using regular drywall instead of cement board or specialized tile backer board in wet areas, or using non-waterproof thin-set, can lead to failure.
- Not Overlapping Seams Correctly: For sheet membranes, insufficient overlap or poor sealing of seams creates weak points where water can penetrate.
- Failing to Cure Properly: Not allowing liquid membranes to fully cure between coats or before tiling can compromise their integrity.
- Lack of a Flood Test: For shower pans, a flood test (filling the pan with water and letting it sit for 24-48 hours) is crucial to verify the waterproofing’s integrity before tiling. Skipping this step means discovering leaks only after the project is complete.
Conclusion
The decision of how to waterproof your bathroom, particularly in wet zones like showers, is foundational to the longevity and health of your home. While “bathroom waterproofing before tiling” and “waterproof bathroom walls” both aim to mitigate water damage, they represent different approaches with distinct advantages. Understanding whether your project calls for the design flexibility and robust, layered protection of a traditional tiled system with a dedicated membrane, or the speed and low maintenance of an integrated panel system, is key. Ultimately, the choice should align with your aesthetic desires, budget constraints, and the specific demands of the bathroom’s use, always prioritizing a continuous, impermeable barrier against moisture.
DIY safety disclaimer
Home Leak Fix publishes general DIY information for homeowners. Water intrusion can involve structural, electrical, height, mould, or insurance risks. Use proper safety equipment, follow local building rules, and call a qualified professional when a repair is unsafe, unclear, or beyond your experience.