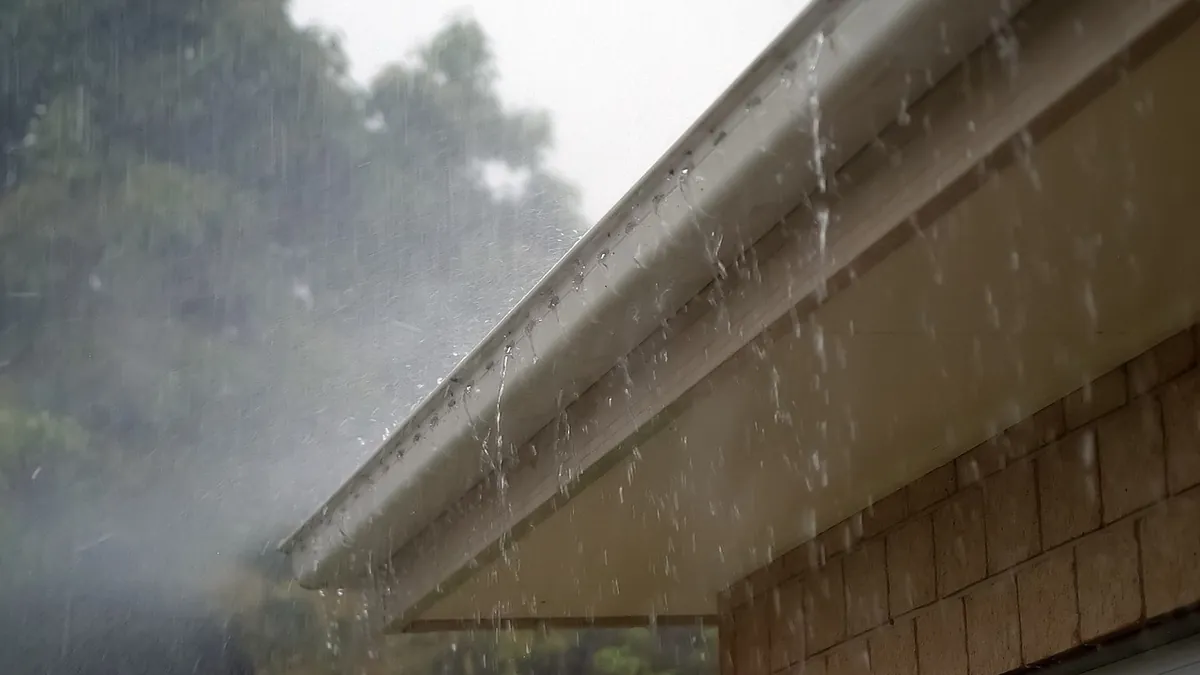
A leaking gutter corner can seem like a minor issue, but it can lead to significant problems if not addressed correctly. Water overflowing or dripping consistently from a corner can erode landscaping, damage fascia boards, stain siding, and even compromise a home’s foundation over time. The goal of sealing a leaking gutter corner is to create a watertight barrier that restores the gutter system’s ability to direct water away from the house effectively. This process often involves understanding the nature of the leak, selecting appropriate materials, and applying them in a way that provides a lasting repair, rather than a temporary fix that exacerbates the problem.
Key Differences Between Sealing a Leaking Gutter Corner and Addressing a Gutter Corner Seam Leak
While the terms “sealing a leaking gutter corner” and “addressing a gutter corner seam leak” might sound interchangeable, there’s a subtle but important distinction in emphasis and approach. Understanding this can guide a more effective repair.
“Sealing a leaking gutter corner” generally refers to the broader act of stopping water from escaping any part of the gutter’s corner section. This could be due to a variety of issues, including:
- Material fatigue: The gutter material itself, particularly at the corner, has developed a crack or pinhole.
- Fastener failure: Rivets or screws holding the corner together have loosened or corroded, creating gaps.
- Improper installation: The corner piece was never correctly fitted or sealed from the outset.
- Damage: An impact (e.g., from a falling branch or ladder) has deformed the corner.
The approach to “sealing a leaking gutter corner” might involve cleaning, patching, reinforcing, or applying a sealant across a broader area, depending on the identified cause. It’s a comprehensive term for fixing water egress from that specific junction.
“Addressing a gutter corner seam leak,” on the other hand, specifically targets leaks occurring at the seams where two sections of gutter or a gutter section and a corner piece join. These seams are inherently vulnerable points due to the nature of their construction. Common reasons for seam leaks include:
- Degraded sealant: The original sealant applied during installation has dried out, cracked, or peeled away.
- Thermal expansion and contraction: Repeated heating and cooling cycles cause the gutter materials to expand and contract, eventually stressing and breaking the seam’s bond.
- Poor adhesion: The sealant was not properly applied, or the surfaces were not clean when it was initially installed, leading to premature failure.
- Mechanical stress: Weight from debris, ice, or even improper pitch can put strain on the seams.
When addressing a seam leak, the primary focus is often on removing old, failed sealant, thoroughly cleaning the seam, and then applying new, flexible, and durable sealant specifically designed for gutter materials. The repair is more localized to the joint itself.
Practical Implications and Trade-offs:
- Scope of Work: Sealing a broad corner leak might require more extensive surface preparation or even structural reinforcement if the gutter material is compromised. Addressing a seam leak often involves more precise work on the joint.
- Material Choice: For a general corner leak, a patching compound or a more robust sealant might be needed. For a seam leak, a high-quality, flexible gutter sealant (like a urethane or advanced polymer) is usually the go-to.
- Diagnosis: Accurately identifying whether the leak is a general corner issue or specifically a seam failure guides the repair process. A seam leak that is misdiagnosed as a general corner leak might lead to an insufficient patch, while a general corner leak treated only as a seam issue might leave other problem areas unaddressed.
Consider a scenario: If you see water dripping from the middle of a gutter corner piece (not at the edges where it connects to other sections), that’s a general “leaking gutter corner” scenario, possibly due to a crack in the corner itself. You might clean the area, roughen it, and apply a patch or a thick layer of liquid sealant. If the water is clearly coming from the joint where the corner piece meets the straight run of guttering, that’s a “gutter corner seam leak,” requiring careful removal of old sealant and precise reapplication of a new bead along the seam.
Shared Benefits and Overlaps
Despite their distinct focuses, both “sealing a leaking gutter corner” and “addressing a gutter corner seam leak” share fundamental benefits and often overlap in the tools, materials, and preparatory steps involved. Ultimately, they both aim to achieve the same critical outcome: a dry, functional gutter system.
Shared Benefits:
- Preventing Water Damage: This is the primary benefit. By stopping leaks, both approaches protect fascia boards, soffits, siding, foundations, and landscaping from water erosion and rot. This saves homeowners from potentially expensive repairs down the line.
- Maintaining Home Value: A well-maintained exterior, free from water stains and rot, contributes positively to a home’s curb appeal and overall value. Addressing gutter leaks is a key part of this maintenance.
- Extending Gutter Lifespan: Timely repairs prevent minor leaks from worsening, which could otherwise necessitate early replacement of entire gutter sections or the whole system. A small leak ignored can lead to widespread corrosion and structural failure.
- Cost-Effectiveness: Repairing a leak is almost always more economical than replacing an entire gutter section or dealing with subsequent water damage to the house structure.
- Improved Water Management: A sealed gutter system efficiently channels rainwater away from the home, preventing pooling around the foundation and reducing the risk of basement flooding or moisture intrusion.
- Reduced Pest Infestation Risk: Standing water or damp, rotting wood near the home’s exterior can attract pests like mosquitoes, termites, and carpenter ants. Sealing leaks eliminates these attractive conditions.
Overlaps in Process and Materials:
- Cleaning and Preparation: Both repair types require thorough cleaning of the affected area. This involves removing debris, old sealant (if applicable), rust, and any loose paint. A clean, dry surface is crucial for proper adhesion of any new sealant or patch.
- Inspection: A careful inspection is vital for both. This means not just identifying the leak point but also understanding its cause and extent. Is it a small drip, a steady stream, or is there visible corrosion?
- Material Compatibility: The choice of sealant or patching material often needs to be compatible with the gutter material (aluminum, steel, copper, vinyl). Many high-quality gutter sealants are designed to adhere to a variety of substrates, making them suitable for both general corner leaks and specific seam repairs. Examples include advanced polymer sealants, urethane sealants, and certain types of butyl rubber sealants.
- Application Techniques: While the precise location of application might differ, the general technique for applying sealants is similar: a steady bead, ensuring full coverage and good adhesion, often followed by tooling for a smooth, watertight finish. For patching, the principles of surface preparation and firm application are consistent.
- Safety Precautions: Working on gutters almost always involves ladders, so safety precautions like stable ladder placement, working with a spotter, and avoiding work in wet or windy conditions are paramount, regardless of whether you’re sealing a corner or a seam.
In essence, while the diagnostic focus might shift slightly, the practical steps and underlying goals of these repair efforts are deeply intertwined. A successful repair for either often relies on the same principles of thorough preparation, appropriate material selection, and careful application.
When Sealing a Leaking Gutter Corner May Be a Better Fit
“Sealing a leaking gutter corner” as a broader concept becomes the more appropriate approach when the leak isn’t solely confined to a visible seam or when the corner itself has sustained damage beyond just a failing joint. This comprehensive view addresses problems that might not be immediately obvious as seam failures.
Here are scenarios where a broader “sealing the corner” approach is likely more effective:
- Material Cracks or Punctures: If the gutter corner piece itself has developed a hairline crack, a pinhole, or a small puncture (e.g., from an errant nail, a sharp piece of debris, or fatigue over time), the leak isn’t a seam issue. A seam sealant alone won’t address this. Instead, a more robust repair might be needed, such as:
- Patching: Applying a repair patch (e.g., made of aluminum or a flexible membrane) secured with epoxy or a strong adhesive, and then sealing around its edges.
- Liquid Rubber/Polymer Sealant: Applying a thick, brushable or trowelable liquid sealant that forms a continuous, flexible membrane over the compromised area, effectively creating a new watertight surface.
- Specific Example: Imagine a small, star-shaped crack in the bottom of an aluminum corner piece. Simply running a bead of silicone along it might not hold. A better approach would be to clean the area, perhaps lightly sand it, and then apply a small metal patch with a strong adhesive, sealing the patch edges thoroughly.
- Corrosion Damage: If the gutter material at the corner shows signs of significant corrosion, leading to pitting or thinning that allows water to seep through, a simple seam sealant won’t suffice. The compromised material needs to be reinforced or covered. This often calls for:
- Surface Preparation: Thoroughly cleaning and possibly wire-brushing away rust.
- Rust-Inhibiting Primer: Applying a primer formulated to stop rust.
- Encapsulation: Applying a durable, flexible coating or patch material over the corroded area to seal it off and prevent further degradation.
- Specific Example: A galvanized steel gutter corner might have a section where the protective coating has worn thin, and rust has created a porous area. Cleaning and then applying a rust-inhibiting sealant or even a small piece of flashing secured with a strong adhesive would be more appropriate than just sealing a seam.
- Deformed or Warped Corners: If the gutter corner has been physically deformed (e.g., by heavy ice, a falling branch, or impact), it might no longer sit flush or hold its original shape. This deformation can create gaps or stress points that leak, not necessarily at a seam, but because the entire structure is compromised. In such cases:
- Reshaping (if possible): Carefully attempting to bend the gutter back into its original form.
- Reinforcement: Using additional fasteners or brackets to hold the corner in a more stable position.
- Extensive Sealing: Applying sealant more broadly across the entire deformed area, possibly in conjunction with a patch, to bridge gaps that cannot be fully closed.
- Specific Example: An older vinyl gutter corner might have sagged or warped significantly, causing water to pool and eventually leak from a weak point. Reshaping and then applying a flexible, UV-resistant sealant over the affected area, along with potential structural support, would be the necessary repair.
- Undetermined Leak Origin within the Corner: Sometimes, water drips from a corner, but the exact source isn’t a clear seam or a visible crack. It might be seeping from multiple tiny points, or the leak path is obscured. In these situations, a broad-spectrum approach to sealing the entire corner area can be more effective than trying to pinpoint an invisible seam failure.
- Specific Example: You see water dripping from the underside of a gutter corner, but after a thorough visual inspection, you can’t see an obvious crack or seam failure. The water seems to be permeating through. Applying a liquid rubber or similar coating to the entire interior surface of the corner, ensuring it extends slightly beyond the corner onto the adjacent straight sections, can effectively seal all potential micro-leaks.
In essence, “sealing a leaking gutter corner” is the more encompassing strategy when the leak’s origin is structural damage to the corner piece itself, widespread material degradation, or when the precise source remains elusive but is clearly within the corner assembly. It moves beyond just the joint to address the integrity of the corner unit as a whole.
When Addressing a Gutter Corner Seam Leak May Be a Better Fit
Focusing specifically on “addressing a gutter corner seam leak” is the most effective and often the most straightforward approach when the evidence clearly points to a failure at the joint where gutter sections meet. These are typically the easiest leaks to diagnose and repair if done correctly.
Here are scenarios where targeting the seam is the appropriate course of action:
- Visible Degradation of Existing Sealant: This is the most common indicator. If you can see old caulk or sealant that is cracked, peeling, brittle, or completely missing along the seam where the corner piece joins a straight gutter section, or where two parts of a corner meet, then you have a seam leak.
- Specific Example: You observe a bead of silicone sealant along the inside joint of an aluminum gutter corner. This sealant is hard, discolored, and has visible gaps or breaks in it, and water is dripping directly from these compromised areas when it rains. The solution is to remove the old sealant and apply new.
- Discoloration or Water Marks Directly Below a Seam: Water traveling along the underside of a gutter will typically leave a trail. If water marks or algae growth are concentrated directly below a seam, it strongly suggests the seam is the point of failure.
- Specific Example: There’s a dark, algae-stained streak running down the siding directly below the seam where the gutter corner connects to the main run. This indicates water is escaping precisely at that joint.
- Gaps or Separation at the Joint: Over time, due to thermal expansion/contraction or minor structural shifts, gutter sections can pull apart slightly at their seams. Even a tiny gap can allow water to escape.
- Specific Example: You can visually detect a hairline gap, perhaps less than a millimeter wide, between the two metal pieces forming the corner joint. This gap might not be visible from a distance, but upon close inspection, it’s clearly a potential leak path.
- Newer Installations with Early Leakage: If a gutter system is relatively new but a corner is leaking, it’s often due to an initial oversight in sealing the seams during installation. The materials themselves are likely sound, but the joint was improperly prepared or sealed.
- Specific Example: Gutters were installed last year, and a corner just started leaking. Upon inspection, the seam sealant looks thin, uneven, or was applied to a dirty surface, causing it to fail quickly. The underlying gutter material is in good condition.
- Segmented Gutter Systems: Homes with segmented (non-seamless) gutters have many more seams than seamless systems. Each joint is a potential leak point. Corners in these systems are often separate pieces joined to straight runs, making accurate seam sealing critical.
- Specific Example: You have a traditional sectional gutter system where each corner is a pre-fabricated piece riveted and sealed to adjacent straight lengths. A leak at one of these connections almost always points to a seam failure.
When addressing a seam leak, the primary focus is on meticulous preparation of the joint. This involves thoroughly cleaning the seam, often scraping out all traces of old, failed sealant, ensuring the surfaces are dry and free of debris, and then applying a fresh, continuous bead of high-quality, flexible gutter sealant. The goal is to restore the integrity of that specific connection point, allowing the rest of the gutter material, which is presumed to be sound, to continue functioning as intended. This targeted approach prevents unnecessary work on areas that aren’t compromised.
How to Choose Based on Goals and Context
Selecting the right approach for a leaking gutter corner depends on accurately diagnosing the problem, considering the gutter system’s age and material, and evaluating your own capacity for the repair. The choice isn’t always about one method being inherently superior, but rather about which method best suits the specific leak.
Here’s a breakdown of how to choose, complete with a decision table:
1. Accurate Diagnosis is Paramount: Before anything else, determine why the corner is leaking.
- Is it clearly a seam? Look for cracked, peeling, or missing sealant along the joint lines.
- Is it a crack or hole in the gutter material itself? Inspect the flat or curved surfaces of the corner for punctures, fatigue cracks, or corrosion spots.
- Is the corner deformed or separating structurally? Check if the metal is bent or if the corner pieces are pulling apart.
- Is the leak location vague? Sometimes water drips, but the exact entry point isn’t obvious, suggesting multiple micro-leaks or a larger, hidden issue.
2. Consider the Gutter Material and Age:
- Aluminum/Steel: These can crack, corrode, or have seams fail. Sealants and patching work well.
- Copper: Often soldered. Leaks can be due to failed solder joints or actual material fatigue. Repair might involve re-soldering or specialized sealants.
- Vinyl: Prone to warping, cracking from UV exposure, or connections separating. Flexibility in sealant is key.
- Older Gutters: More likely to have widespread material fatigue, multiple small leaks, or significant corrosion. A broader “sealing the corner” approach might be necessary.
- Newer Gutters: Leaks often point to initial installation errors, usually at seams.
3. Evaluate the Extent of the Damage:
- Small, localized drip from a seam: Likely a straightforward seam re-seal.
- Steady stream from a crack in the corner piece: Requires patching or a more robust, membrane-forming sealant.
- Widespread seepage or multiple small leaks within the corner: Suggests a more comprehensive coating or encapsulation of the entire corner area.
- Structural deformation: May require mechanical reinforcement in addition to sealing.
4. Assess Your Skill Level and Resources:
- DIY Aptitude: Replacing old sealant and applying new is generally a manageable DIY task. Patching or dealing with extensive corrosion might require more specialized tools or knowledge.
- Safety: Working on ladders always carries risk. If the corner is high or difficult to access, consider professional help.
- Time and Budget: A quick seam repair is less time-consuming and costly than a full corner overhaul or replacement.
Decision Table: Choosing Your Gutter Corner Repair Approach
| Symptom/Context | Primary Leak Type | Recommended Approach | Considerations |
|---|---|---|---|
| Visible cracks/peeling sealant at joint | Gutter Corner Seam Leak | Remove old sealant, clean, apply new flexible gutter sealant. | Ensure surfaces are dry. Use high-quality, compatible sealant. |
| Hairline crack in corner body | Leaking Gutter Corner | Clean, roughen surface, apply patch (metal/membrane) + sealant, or thick liquid polymer sealant. | Patch material should be compatible. Ensure full coverage beyond crack. |
| Pinhole/small puncture in corner body | Leaking Gutter Corner | Clean, apply small patch with strong adhesive, seal edges; or apply strong, flexible sealant over hole. | Focus on creating a solid, watertight barrier over the small defect. |
| Significant corrosion/pitting | Leaking Gutter Corner | Clean thoroughly (wire brush), apply rust inhibitor, then patch/coat with liquid rubber or robust sealant. | Requires thorough rust removal and appropriate rust-treatment products. |
| Deformed/separated corner structure | Leaking Gutter Corner | Attempt to reshape/reinforce mechanically, then apply flexible sealant or patch over compromised areas. | May require drilling new rivets or screws. Sealing alone might not hold. |
| Vague, widespread seepage in corner | Leaking Gutter Corner | Thorough cleaning, then apply a broad-area liquid rubber or polymer coating to interior of corner. | Ensure entire interior surface is coated for comprehensive sealing. |
| New installation, early leak | Gutter Corner Seam Leak | Likely re-sealing due to improper initial application. | Check if under warranty. Focus on meticulous seam preparation and application. |
| Old, failing gutter system | Leaking Gutter Corner | Comprehensive sealing or consider full replacement if degradation is widespread. | Evaluate overall gutter health. Repairs might be temporary if system is failing. |
By carefully assessing these factors, you can make an informed decision that leads to a durable repair, preventing further water damage without making the initial problem worse. Sometimes, a combination of techniques might be necessary for complex issues.
Frequently Asked Questions
What is “seal leaking gutter corner”?
“Seal leaking gutter corner” refers to the process of stopping water from escaping any part of a gutter’s corner section. This can involve fixing cracks, holes, or structural compromises in the corner piece itself, as well as addressing failed seams where the corner connects to other gutter sections. The goal is to restore the watertight integrity of the corner, ensuring rainwater is properly directed away from the building.
How does “seal leaking gutter corner” compare with alternatives?
The primary “alternative” isn’t a different method of stopping the leak, but rather a different focus in repair. The term “seal leaking gutter corner” is a broad umbrella, encompassing various specific repair techniques. The main comparison point is often “addressing a gutter corner seam leak.”
- “Seal leaking gutter corner” (broader approach): This method is more comprehensive. It’s suitable when the leak is due to a crack in the gutter material, corrosion, significant deformation of the corner piece, or if the exact source of the leak is unclear but localized to the corner. It might involve patching, applying liquid rubber coatings, or reinforcing the corner structurally, in addition to sealing seams.
- “Addressing a gutter corner seam leak” (targeted approach): This method is focused specifically on the joint where two pieces of gutter material meet. It’s ideal when the existing sealant at the seam is visibly degraded, cracked, or missing, and the rest of the gutter material is sound. The repair typically involves removing old sealant, cleaning the seam, and applying a new, flexible bead of gutter sealant.
The choice between these is based on diagnosis: if the leak is clearly at a joint, address the seam. If it’s a crack in the corner itself, or a broader issue, the more encompassing “seal leaking gutter corner” approach is needed. The ultimate alternative to repair is replacement of the corner piece or even the entire gutter section, which is typically more expensive and disruptive.
What are the most common mistakes people make when sealing a leaking gutter corner?
Making a gutter corner leak worse often stems from common errors during the repair process. Here are the most frequent mistakes:
- Improper Surface Preparation: This is perhaps the biggest culprit. Applying sealant or a patch to a dirty, wet, greasy, or rusty surface will almost guarantee failure. The new material won’t adhere properly, leading to a quick return of the leak.
- Not Removing Old, Failed Sealant: Attempting to simply caulk over old, cracked, or peeling sealant is ineffective. The new sealant will only bond to the old, failing material, rather than the gutter itself, and will soon detach.
- Using the Wrong Type of Sealant: Not all sealants are created equal. Using standard household caulk (like acrylic latex) that isn’t designed for outdoor use, isn’t flexible enough, or isn’t compatible with gutter materials (aluminum, vinyl, steel) will result in a short-lived repair. Gutter sealants need to withstand UV exposure, extreme temperatures, and constant water immersion.
- Applying Insufficient Sealant or Patch Material: A thin, uneven bead of sealant, or a patch that doesn’t extend far enough beyond the leak, won’t create a durable, watertight barrier. The leak will find the path of least resistance.
- Working in Unfavorable Conditions: Applying sealants in cold, wet, or excessively humid conditions can hinder proper curing and adhesion. Most sealants have specific temperature and humidity ranges for optimal application.
- Ignoring the Root Cause: If the leak is due to a sag in the gutter, improper pitch, or loose fasteners, simply sealing the leak without addressing the underlying structural issue will likely lead to the sealant failing again due to continued stress.
- Lack of Safety Precautions: Rushing or being careless on a ladder can lead to falls and serious injury, making any gutter repair much worse than a simple leak.
- Not Allowing Proper Cure Time: Disrupting the sealed area or running water through the gutter before the sealant has fully cured can compromise the bond and lead to immediate failure.
Avoiding these common pitfalls by taking the time for proper diagnosis, preparation, material selection, and careful application will significantly increase the chances of a successful and lasting gutter corner repair.
Conclusion
Effectively sealing a leaking gutter corner is a crucial home maintenance task that safeguards your property from potential water damage. The key to a successful repair lies in accurate diagnosis: understanding whether the leak originates from a seam, a crack in the gutter material, or a broader structural issue within the corner. This diagnostic step dictates whether a targeted seam repair or a more comprehensive corner sealing approach is necessary. By choosing the appropriate method, meticulously preparing the surface, and using high-quality, compatible materials, you can ensure a durable fix. Ignoring the problem, or attempting a quick, ill-suited repair, often leads to compounded issues and greater expense down the line. A thoughtful approach to gutter corner repair protects your home’s integrity and value.
DIY safety disclaimer
Home Leak Fix publishes general DIY information for homeowners. Water intrusion can involve structural, electrical, height, mould, or insurance risks. Use proper safety equipment, follow local building rules, and call a qualified professional when a repair is unsafe, unclear, or beyond your experience.